終於要進入正題了。之所以花了許多篇幅介紹 Lua 以及 coroutine,關鍵就在於 Lua 是遊戲程式中常見的腳本語言(scripting language),而 coroutine 對遊戲程式來說則是相當便利的語言功能。本文將會介紹如何利用 coroutine 改寫遊戲程式中常見的狀態機(state machine)結構,讓程式邏輯清楚而容易維護。
在這篇文章中,我會使用 Corona SDK 來示範。Corona SDK 是手機平台上極受歡迎的一套商用遊戲開發套件,它使用了 Lua 作為腳本語言,並提供模擬器讓開發者在 PC 上即可預覽遊戲畫面。更重要的是,只要在 Corona 的網站上註冊帳號即可無限期免費試用,非常適合獨立開發者或小型工作室使用。如果想進一步了解 Corona,可以參考他們的教學文件。
遊戲引擎的 Frame Listener
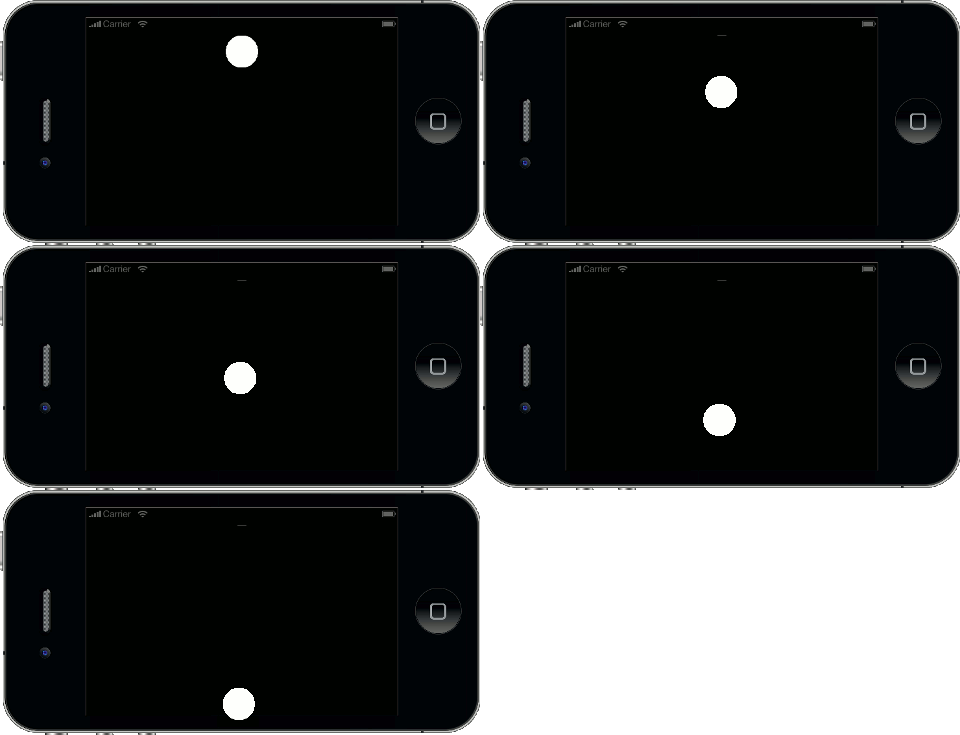
現代的遊戲引擎通常具有相當複雜的功能,在更新每個畫面時,它需要動態地更新場景結構、把多邊形及材質貼圖資料送進顯示晶片、把音樂送進音效晶片、取得玩家輸入資料等等。一般遊戲引擎都把這些複雜的部份包裝起來,藉由讓開發者註冊 frame listener 的方式以創造出不同的遊戲形式。所謂的 frame listener 就是遊戲引擎在每次畫面更新時,都會呼叫的使用者函式。Corona 也使用了這樣的架構,開發者可以用 Runtime:addEventListener() 來註冊 frame listener。
1 2 3 4 5 6 7 8 9 10 11 12 13
| local circle = display.newCircle(display.contentWidth/2, 0, 50) function update(event) circle.y = math.fmod(event.time, display.contentHeight) end Runtime:addEventListener("enterFrame", update)
|

Frame Listener 與狀態機
Frame listener 的機制雖然能讓開發者創造出動態的遊戲畫面,但卻很難做出複雜的行為。因為 frame listener 是每次畫面更新時固定呼叫的函式,若想在裡面描述跨越多格畫面的行為就顯得礙手礙腳。
舉例來說,許多遊戲在一開始時,會出現標題畫面以及「PRESS TO START」的文字,按下後會進入遊戲模式。最簡單的寫法是這樣:
1 2 3 4 5 6 7 8 9 10 11 12 13
| local storyboard = require("storyboard") local text = display.newText("PRESS TO START", 0, 0, nil, 40) text.x = display.contentWidth/2 text.y = display.contentHeight/2 function onPress() storyboard.gotoScene("GamePlay") end text:addEventListener("touch", onPress)
|
不過,這樣的遊戲介面屬於粗製濫造的等級。幾乎所有的遊戲在秀出標題畫面時都會有個進場動畫特效,接著「PRESS TO START」的文字會開始閃爍吸引玩家點擊,點下後並不會馬上進入遊戲模式,而是播放淡出的動畫特效(或許再加上音效)之後才會進入遊戲模式。
Corona 提供了一些好用的函式來播放動畫特效,但動畫有其播放時間,我們沒辦法在 frame listener 中做到「暫停直到動畫結束」之類的事。因為 frame listener 函式結束後,遊戲引擎才能畫出下一格畫面。若我們使用 sleep() 之類的方式暫停,整個遊戲引擎也會隨之停擺。
1 2 3 4 5 6 7 8 9
| function update(event) transition.from(text, {time=500, xScale=2, yScale=2, alpha=0}) repeat until system.getTimer() > event.time+500 end
|
最常見的解法之道,是使用狀態機去記錄目前操作介面的狀態。這個操作介面的流程畫成狀態機後是長這樣:

轉換為程式碼後會長這樣:
1 2 3 4 5 6 7 8 9 10 11 12 13 14 15 16 17 18 19 20 21 22 23 24 25 26 27 28 29 30 31 32 33 34 35 36 37 38 39 40 41 42 43 44 45 46 47 48 49 50 51 52 53 54 55 56 57
| local STATE = { ENTER = 0, WAIT = 1, LEAVE = 2 } local state local animation_start function update(event) if state == STATE.ENTER then if event.time > animation_start + 500 then state = STATE.WAIT end elseif state == STATE.WAIT then local cycle, phase = math.modf((event.time-500)/400) if cycle%2 == 0 then text.alpha = 1-phase else text.alpha = phase end elseif state == STATE.LEAVE then if event.time - animation_start > 400 then storyboard.gotoScene("GamePlay") end end end function onPress(event) if state == STATE.WAIT then state = STATE.LEAVE animation_start = event.time transition.to(text, {time=400, alpha=0, xScale=3, yScale=3}) end end text:addEventListener("touch", onPress) Runtime:addEventListener("enterFrame", update) state = STATE.ENTER animation_start = system.getTimer() transition.from(text, {time=500, alpha=0, xScale=2, yScale=2})
|
狀態機是常見的解法,但並不漂亮。這樣的寫法至少有兩個問題:
- 流程並不直覺,因為我們大量使用 if-else 判斷,誰先誰後顯得很難理解。
- 我們要使用外部變數
state 和 animation_start 來儲存狀態。儘管宣告為 local,但它的作用範圍仍然比 update 大得多。在流程更加複雜的時候,外部變數的數量也會大幅增加。
另外,上面這段程式碼有個隱藏的小 bug,而且為了修正這個 bug 會需要增加另一個 state 使得程式碼更為難懂。如果你喜歡玩推理遊戲,可以試著找找看。
使用 Coroutine 進行改寫
在這系列的第一篇文章中提到,coroutine 是「可以中斷及繼續執行的函式呼叫」。若我們把上述的 frame listener 改成對 coroutine 的持續呼叫(resume),可以讓程式變得非常漂亮。
先來看看如何做到文字的進場特效:
1 2 3 4 5 6 7 8 9 10 11 12 13 14 15 16 17
| local co = coroutine.create( function(timer) transition.from(text, {time=500, alpha=0, xScale=2, yScale=2}) while timer < 500 do timer = coroutine.yield() end end) Runtime:addEventListener("enterFrame", function(event) if coroutine.status(co) == "suspended" then coroutine.resume(co, event.time) end end)
|
播放動畫的程式碼是一樣的,但是下面的 while 迴圍很明確地表達出等待 500 毫秒這個意圖。我們來看看要如何加入待機時的閃爍效果:
1 2 3 4 5 6 7 8 9 10 11 12 13 14 15 16 17 18 19 20 21 22 23 24 25
| local co = coroutine.create( function(timer) transition.from(...) while timer < 500 do ... end local clicked = false while not clicked do timer = coroutine.yield() local cycle, phase = math.modf((timer-500)/400) if cycle%2 == 0 then text.alpha = 1-phase else text.alpha = phase end end end)
|
同樣地,這段程式碼也明確表達出在接收到玩家點擊前,要不斷地閃爍文字。同時,因為這段程式碼就放在進場動畫的下面,清楚說明了進場動畫結束後要閃爍文字這件事。
加入使用者點擊的處理並不會太難:
1 2 3 4 5 6 7 8 9 10 11 12 13
| local clicked = false local function onPress() clicked = true end text:addEventListener("touch", onPress) while not clicked do end text:removeEventListener("touch", onPress)
|
我們可以在開始閃爍前註冊 event listener,結束後移除它,這麼一來就不需要在 event listener 中檢查狀態,因為玩家只有在閃爍的狀態才會觸發它。
最後是離場動畫。但這邊有個小狀況,也就是前面提到的 bug:若玩家在文字閃爍至全透明的狀態時點擊,動畫效果會變成已經透明的文字放大淡出,實際上是看不見的。儘管這並不影響遊戲過程,但這類小小的動畫瑕疵卻是遊戲精緻與否的關鍵。因此我們要先讓他淡入至不透明,再進行放大加淡出的特效。
1 2 3 4 5 6 7 8 9 10 11 12 13 14 15 16 17 18 19 20
| text:removeEventListener("touch", onPress) local delta = (1-text.alpha) * 300 transition.to(text, {time=delta, alpha=1}) local animation_end = timer + delta while timer < animation_end do timer = coroutine.yield() end transition.to(text, {time=400, alpha=0, xScale=3, yScale=3}) animation_end = timer + 400 while timer < animation_end do timer = coroutine.yield() end storyboard.gotoScene("GamePlay")
|
注意到我們的程式碼中有許多重覆的 while 橋段,這是等待某段時間的意思,我們可以放到另一個函式:
1 2 3 4
| local function sleep(msec) local wakeup = system.getTimer() + msec repeat until coroutine.yield() > wakeup end
|
完整的程式碼如下:
1 2 3 4 5 6 7 8 9 10 11 12 13 14 15 16 17 18 19 20 21 22 23 24 25 26 27 28 29 30 31 32 33 34 35 36 37 38 39 40 41 42 43 44 45 46 47 48 49 50 51 52 53 54 55 56 57 58 59 60 61
| local storyboard = require("storyboard") local text = display.newText("PRESS TO START", 0, 0, nil, 40) text.x = display.contentWidth/2 text.y = display.contentHeight/2 local function sleep(msec) local wakeup = system.getTimer() + msec repeat until coroutine.yield() > wakeup end local co = coroutine.create( function(timer) transition.from(text, {time=500, alpha=0, xScale=2, yScale=2}) sleep(500) local clicked = false local function onPress() clicked = true end text:addEventListener("touch", onPress) while not clicked do timer = coroutine.yield() local cycle, phase = math.modf((timer-500)/400) if cycle%2 == 0 then text.alpha = 1-phase else text.alpha = phase end end text:removeEventListener("touch", onPress) local delta = (1-text.alpha) * 300 transition.to(text, {time=delta, alpha=1}) sleep(delta) transition.to(text, {time=400, alpha=0, xScale=3, yScale=3}) sleep(400) storyboard.gotoScene("GamePlay") end) Runtime:addEventListener("enterFrame", function(event) if coroutine.status(co) == "suspended" then coroutine.resume(co, event.time) end end)
|
使用 coroutine 的寫法,並不一定會比較短(這段程式還多了上述 bug 的處理部份),但意圖比較清楚,因為我們可以用控制結構來表達流程:
- 程式碼的先後順序就代表流程上的先後順序。
- while 迴圈表示我們要等待到某個條件。
- yield 表示等待一格 frame。
此外,唯一的外部變數只剩下 co,也就是 coroutine 本身。其它的狀態都被封裝在 co 內部,即使加入新的流程也不會增加外部變數。
原本我想在這篇文章就結束 coroutine 系列,不過顯然需要的篇幅超出了預期。在下一篇文章中,我會談到當程式規模開始龐大時,coroutine 如何協助我們寫出更容易維護、擴充的程式碼。

