使用 Coroutine 改寫狀態機-續

這是 coroutine 系列的最後一篇。相較於狀態機,coroutine 的優勢除了程式碼比較容易理解外,還有可重覆利用的特性。

在這篇文章中,我們會以對話框作為範例,探討如何讓這個遊戲中的常見功能變得容易使用。

我們要製作的對話框看起來非常簡單,就像這樣:
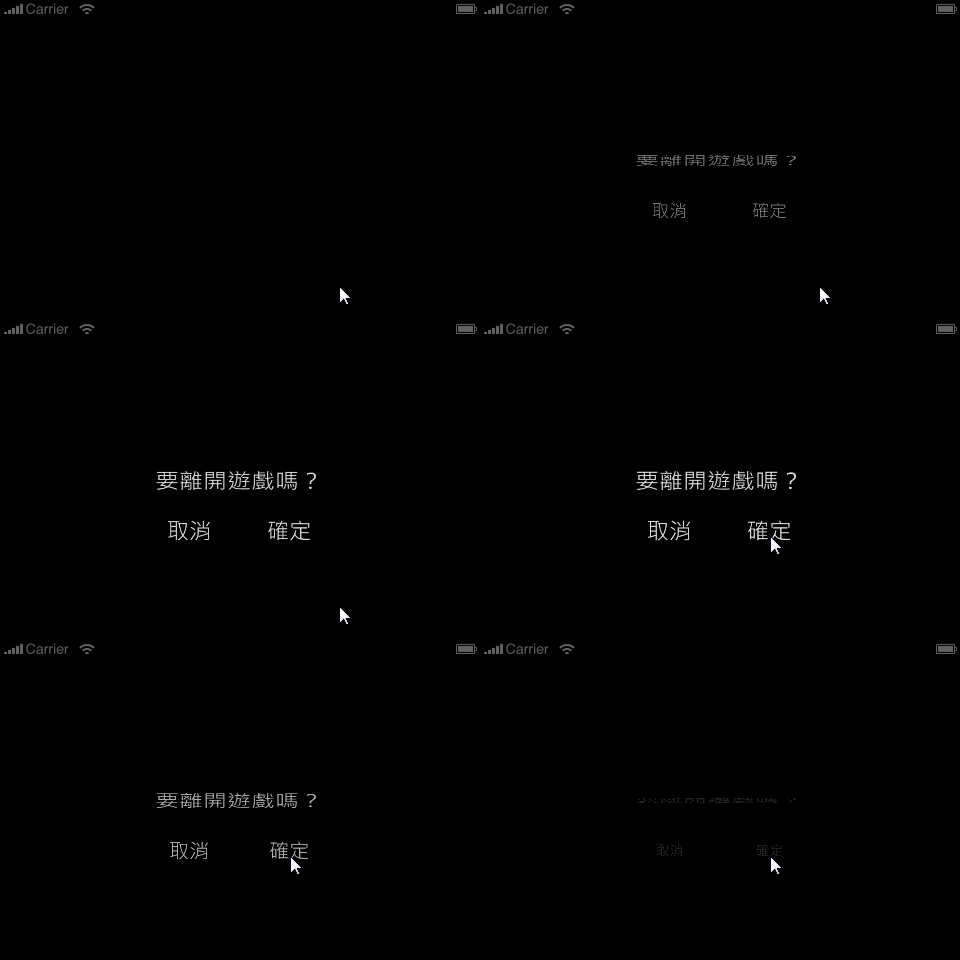
對話框

這種對話框在遊戲中相當常見,我們先試著用狀態機來實作看看。

使用狀態機的情況

對話框的各個 state 長這樣:

對話框流程

因此我們需要定義三個 state 如下:

1
2
3
4
5
6
7
8
9
10
11
12
13
14
15
16
17
18
19
20
21
22
23
24
25
26
27
28
29
30
31
32
33
34
35
36
37
38
39
40
41
42
43
44
45
46
47
48
49
50
51
52
53
54
55
56
57
58
59
60
61
62
63
64
65
66
67
68
69
70
71
72
73
74
75
76
77
78
79
80
81
82
83
84
85
86
87
88
89
90
91
92
93
94
95
96
97
98
99
100
101
102
103
104
-- 對話框的 UI 物件
local dialog_title, dialog_ok, dialog_cancel
-- 記錄動畫時間
local animation_end
-- 玩家選擇的答案
local answer
-- 對話框的資訊文字
dialog_text = "fill question here"
-- 兩個按鈕的 event listener
local function onOkPressed()
if answer == nil then answer = true end
end
local function onCancelPressed()
if answer == nil then answer = false end
end
state_table["DIALOG_ENTER"] = {
-- 進入這個 state 時呼叫的函式
enter = function()
-- 建立 UI 元件
-- 假設上一個 state 已經設定好 dialog_text 作為訊息文字
dialog_title = display.newText(dialog_text, ...)
dialog_ok = display.newText("OK", ...)
dialog_cancel = display.newText("Cancel", ...)
-- 播放動畫效果
transition.from(dialog_title,
{time=500, alpha=0, yScale=0.1})
transition.from(dialog_ok,
{time=500, alpha=0, xScale=0.5, yScale=0.5})
transition.from(dialog_cancel,
{time=500, alpha=0, xScale=0.5, yScale=0.5})
animation_end = system.getTimer() + 500
end,
-- 畫面更新時呼叫的函式
update = function()
if system.getTimer() > animation_end then
gotoState("DIALOG_WAIT")
end
end,
-- 離開這個 state 時呼叫的函式
leave = function()
-- 不做事
end
}
state_table["DIALOG_WAIT"] = {
enter = function()
-- 開始等待玩家點擊
dialog_ok:addEventListener("touch", onOkPressed)
dialog_cancel:addEventListener("touch", onCancelPressed)
end,
update = function()
if answer ~= nil then
-- 點擊後轉移到下個 state
gotoState("DIALOG_LEAVE")
end
end,
leave = function()
dialog_ok:removeEventListener("touch", onOkPressed)
dialog_cancel:removeEventListener("touch", onCancelPressed)
end
}
state_table["DIALOG_LEAVE"] = {
enter = function()
-- 播放動畫效果
transition.to(dialog_title,
{time=500, alpha=0, yScale=0.1})
transition.to(dialog_ok,
{time=500, alpha=0, xScale=0.5, yScale=0.5})
transition.to(dialog_cancel,
{time=500, alpha=0, xScale=0.5, yScale=0.5})
animation_end = system.getTimer() + 500
end,
update = function()
if system.getTimer() > animation_end then
if answer then
gotoState("A") -- "A" 是指?...
else
gotoState("B") -- "B" 又是指?...
end
end
end,
leave = function()
-- 移除 UI元件
dialog_title:removeSelf()
dialog_ok:removeSelf()
dialog_cancel:removeSelf()
end
}

理論上,不管在任何 state,只要讓狀態機轉移到 DIALOG_ENTER 這個狀態,就相當於呼叫了對話框功能,對話框會開始播放動畫,接著移動到 DIALOG_WAIT 狀態等待玩家選擇。然而在對話框結束後我們卻遇到一個困難:既然狀態機中的任意 state 都可以「呼叫」對話框功能,我們怎麼知道對話框結束後要轉移到哪一個 state 呢?總不能讓每個對話框都結束遊戲吧?

(真實的)對話框流程

簡單而有效的解法是在進入 DIALOG_ENTER 之前,先在兩個全域變數中設定「確定」與「取消」所對應到的狀態,這麼一來在 DIALOG_LEAVE 就知道下一個 state 是什麼了。

1
2
3
4
5
6
7
8
9
10
11
12
13
14
15
16
17
18
-- 確定和取消所對應到的下一個 state
-- 需要在進入 DIALOG_ENTER 之前的 state 負責設定
ok_state = "fill next state when player hit OK"
cancel_state = "fill next state when player hit CANCEL"
state_table["DIALOG_LEAVE"] = {
...,
update = function()
if system.getTimer() > animation_end then
if answer then
gotoState(ok_state)
else
gotoState(cancel_state)
end
end
end
}

總結來說,在狀態機內若要呼叫對話框功能,需要以下的操作:

  1. 設定全域變數 dialog_text 作為對話框的文字。
  2. 設定全域變數 ok_statecancel_state 作為玩家選擇後要轉移的目標 state。
  3. 把目前 state 轉移至 DIALOG_ENTER

Coroutine 的情況

回過頭來看看使用 coroutine 的情況。它的實作並不難,就只是個長一點的函式:

1
2
3
4
5
6
7
8
9
10
11
12
13
14
15
16
17
18
19
20
21
22
23
24
25
26
27
28
29
30
31
32
33
34
35
36
37
38
39
40
41
42
43
44
45
46
47
48
49
50
51
52
53
54
55
function showDialog(dialog_text)
-- 建立 UI 元件
local dialog_title = display.newText(dialog_text, ...)
local dialog_ok = display.newText("OK", ...)
local dialog_cancel = display.newText("Cancel", ...)
-- 淡入動畫效果
transition.from(dialog_title,
{time=500, alpha=0, yScale=0.1})
transition.from(dialog_ok,
{time=500, alpha=0, xScale=0.5, yScale=0.5})
transition.from(dialog_cancel,
{time=500, alpha=0, xScale=0.5, yScale=0.5})
-- 等待動畫結束
sleep(500)
local answer = nil
local function onOkPressed()
answer = true
end
local function onCancelPressed()
answer = false
end
dialog_ok:addEventListener("touch", onOkPressed)
dialog_cancel:addEventListener("touch", onCancelPressed)
-- 等待玩家點擊
while answer == nil do
coroutine.yield()
end
dialog_ok:addEventListener("touch", onOkPressed)
dialog_cancel:addEventListener("touch", onCancelPressed)
-- 淡出動畫效果
transition.to(dialog_title,
{time=500, alpha=0, yScale=0.1})
transition.to(dialog_ok,
{time=500, alpha=0, xScale=0.5, yScale=0.5})
transition.to(dialog_cancel,
{time=500, alpha=0, xScale=0.5, yScale=0.5})
-- 等待動畫結束
sleep(500)
-- 移除 UI 元件
dialog_title:removeSelf()
dialog_ok:removeSelf()
dialog_cancel:removeSelf()
return answer
end

除了流程更加清楚以外,coroutine 還具備以下的優勢:

  1. 不需要用全域變數來傳遞參數或取得回傳值。
  2. 它只是個函式呼叫,我們不需要知道函式被誰呼叫--它在 return 時會自然回到呼叫端。

結語

狀態機並非一無可取。在某些沒有結構化流程中,使用 coroutine 改寫反而較為困難,比如下面這個例子:

非結構化的流程

然而,使用狀態機就像只用 goto 而不使用函式或迴圈來寫程式,面對更加複雜的流程就顯得難以建構與維護。遊戲中需要狀態機的場合,大部份都是具有結構化的流程,因此使用 coroutine 就相當適合。


斷斷續續寫了快一個月的 coroutine 系列總算告一段落了,文章中程式碼所占的比例也達到恐怖的程度。原本我曾想過,在文章中加入這麼多程式碼是否洽當,但若不把程式碼真的寫出來,實在很難理解為何 coroutine 可以讓流程變得清楚易懂。

另一方面,使用 coroutine 通常也會搭配大量的 function object 與 closure,希望各位細細品嘗它們的威力。

分享到 評論